EList Service
Contents[hide] |
What is eList Service?
EList enables you to create a secure list of contacts and email them as a group. These group email helps in mass communication from within your cloud. EList allows you to create a dedicated group-email-address like “salespromotions@mydomain.com” or “monthly-newsletters@mydomain.com”. Having a dedicated mailbox allows a secure and robust approach which allows your target contacts to choose if they want to receive your group-emails or not.
Features:
- eList is integrated right into your Office business Apps Cloud allowing you easy import and export of contact email addresses without any typing effort.
- Integrated Brand management allows to create customized headers and footers for all your outgoing group emails helping you build upon your great product / business-name or logo.
- Create multiple email-lists and manage all of them from a simple user interface. Create separate category of email lists allowing you to group your audience together.
- Create and Manage Contact Addresses and reuse the same address in single/multiple email list. EList automatically verifies the email addresses and keeps it current if the user has changed the email/address or name.
- Easy tracking allows you to verify who opened and read your email. This allows for customized response management and follow-ups for only those contacts who have read your email.
- Email templates allows you to create excellent looking group emails with a few clicks and no technical skill. This adds a professional appeal to your group emails using existing images/pictures, backgrounds, colors, headers and custom contents.
- Advanced Sender Restrictions differentiate your eList from other providers by adding an extensive security gateway for you group-list allowing and securing your group-list. You can setup access restrictions for who can email to the group-list – Only one admin, Many Admin, Only members within your Cloud/Domain/Business, or any one.
- Integrated Spam Management automatically blocks misuse of your group-emails and prune undelivered emails into separate Spam-folders for you to review and purge/delete or resend. Integrated Group-Email History Management allows you to retain all your group-mails categorized into monthly folders for easy access, reference and for re-use in case you need them again.
Benefits:
- Compliment Professional Communication using a group-email list which is your primary business domain (mydomain.com)
- Advanced Security Features to help in access-management – who can send emails to the group can now be controlled.
Technical Information
- Anti-SPAM Filter – Uses Bayes Self-Learning Algorithm Updated Daily to keep group-users protected everyday
- Anti-Virus – Built-in Blocker to STOP delivering group-emails that have viruses
- Storage – All inclusive storage of 5000 MB for storing group-emails.
- Domains – Support the primary business domain name (mydomain.com) for group-emails
- Total Emails – Includes dispatch-bandwidth of upto 20,000 emails per month (Dynamically expand upto 1 million emails)
How eList Works?
Email list allows users within your organization to create and manage group-email facility. You can also define email-rules like who can have access to send or receive group email and related. elist Service has better security features when compared to common Open-Source software like PHP-List (that have several security issues).
To navigate to eList Service, click on the "eList" Icon in your My-Account Page after you login to the Cloud-Service (as shown below):
Add Members To Repository
Step 1: On eList Service Home Page, Click on the "User Entry" Icon on top-menu as shown below.
![]()
Step 2: When "User Repository" Window appears, enter the User's First Name followed by the Last name.
Step 3: Also enter, users email address as shown below:
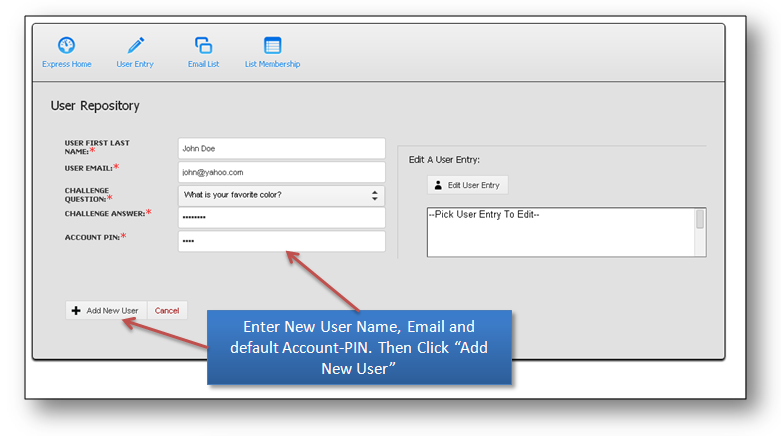
Step 4: Select a Challenge questions and a respective answer.
Step 5: Make sure to enter an Account-PIN for the user. This account-pin is needed for the user to reset the challenge question and to modify subscription preferences.
Step 6: Finally click on "Add New user" button.
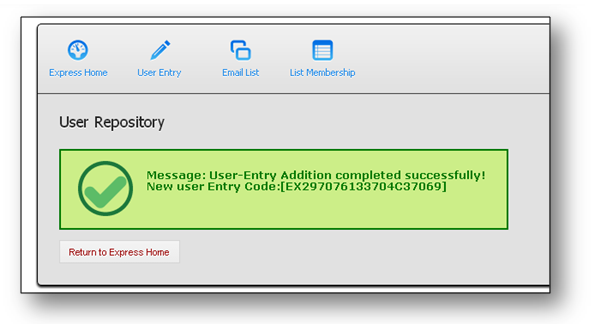
Step 7: Once the User-Entry is created successfully, an confirmation message will appear automatically.
Deleting members from Repository
Step 1: To remove a user, first we need to select the user-entry from the user-list in the "User Repository" window. Then click on "Edit User Entry" button. Once the user entry loads, you should see user-profile entries displayed in the edit-boxes as shown below:
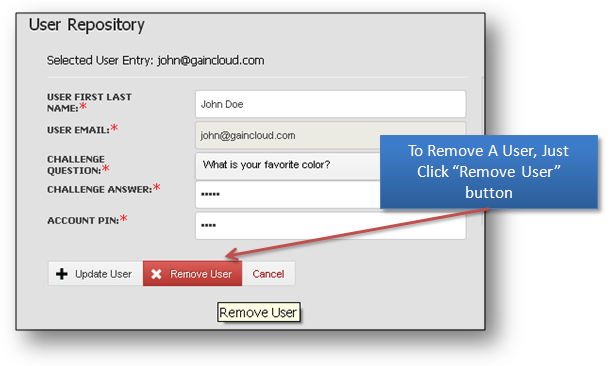
Step 2: Click on the "Remove User" button as marked above, to confirm deletion from user-repository.
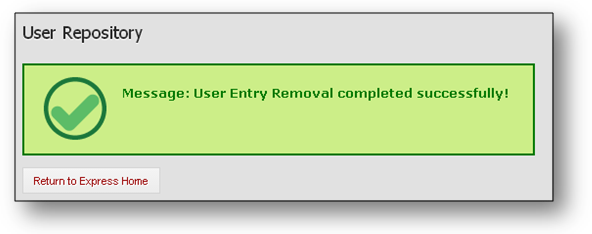
Step 3: A confirmation message regarding successful user-entry removal will be displayed (as shown below).
Creating New Email eList
On eList Service Home Page, Click on the "Email List" Icon on top-menu as shown below.
![]()
Step 1: When "Email List" Window appears, enter the email-list name. The email list name should be in alphanumeric only with no-special and no-spaces allowed. Make sure you enter only the email-list prefix. In the example shown below, we are creating an email-list "customerpromotion". When the list actually gets provisioned, its domain-segment (suffix) will automatically be added (thus creating an email list "customerpromotion@gaincloud.com" since out default domain is gaincloud.com). The eList Service will automatically use your business cloud default domain (you used during the cloud-login).
Step 2: Also enter the list admin-email, secondary admin-email (and optionally delegated admin-email address).
Step 3: Select Display Template Type - which manages how the emails send by this list will be displayed.
Step 4: Next select, the setting for "Use sender email". Selecting "Use Sender Email for Reply" will cause eList emails to be delivered as they arrived from original-email-sender. Otherwise, selecting "Use List Email for Reply" will cause the eList email address being used as email-sender. This options means a lot of several email-system, who look at emails being posted by email-delivery softwares like eList-Service. Many email-services block/stop the delivery of emails if they are posted by an email-service and not being send by the same service (in other words this is called phishing - which is blocked). To make sure your emails get delivered properly, please select "Use List Email for Reply" whenever possible.
Create Simple eList - Under the section "Sender Restrictions" - we would select "Any Internet User Can Send Email To This Email List" option for our simple eList as shown below. As the option selection suggests, any user can send an email to this list as this type of eList has no-restrictions at all.
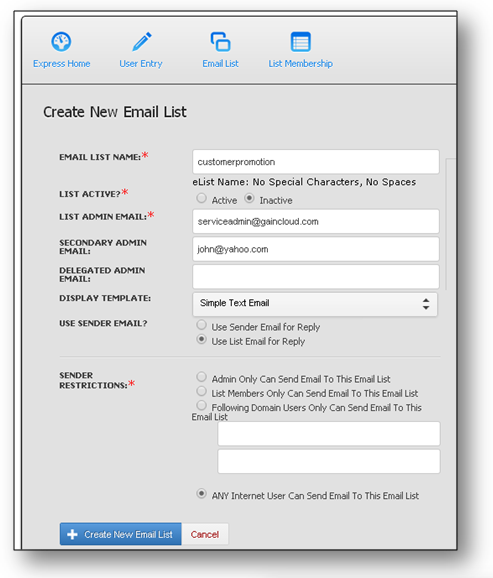
Click on "Create New Email List" to create the eList.
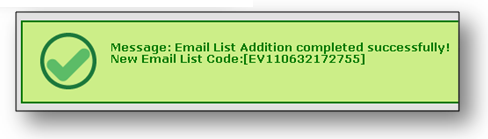
A confirmation message regarding successful eList creation will be displayed as shown below:
Create Domain Restricted eList - A domain-restricted eList, only allows specific users from a pair of pre-defined "allowed" domains to send emails to the eList. This causes only users from a specific company "like gaincloud.com" and another affiliate business like "mybiz.net" to be allowed to send emails to our eList (as shown below). All other email-senders are automatically blocked thus locking down your eList to domain-based-restrictions.
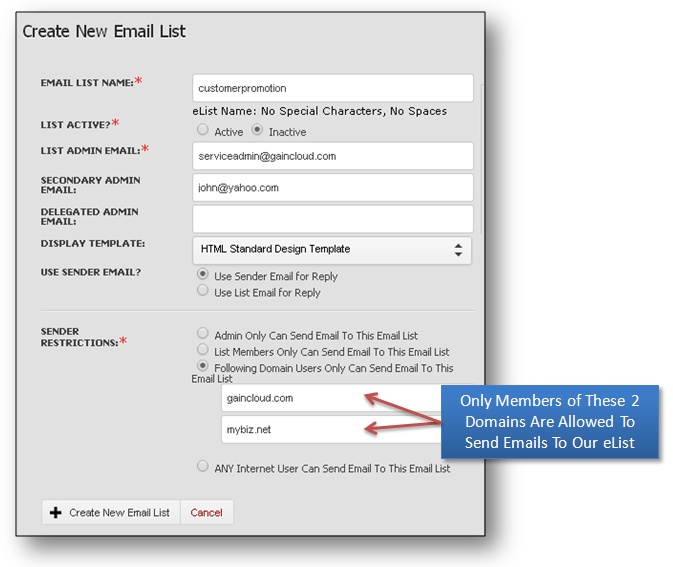
A Domain-restricted eList is most suitable form of eList for businesses and companies, who have multiple domain/business names and the administrator is creating a company-internal email-list (like employees-only) instead of an external list.
Create Member Restricted - A member-restricted eList, only allows the list-members to be able to send email to the eList/group. Any user-account that is "not" defined as a member will not be able to send emails to this eList. To select an eList of type member-restricted, select "List Members Only Can Send Email To This List" option for the section "Sender Restrictions" on the "Email List" Window as shown below:
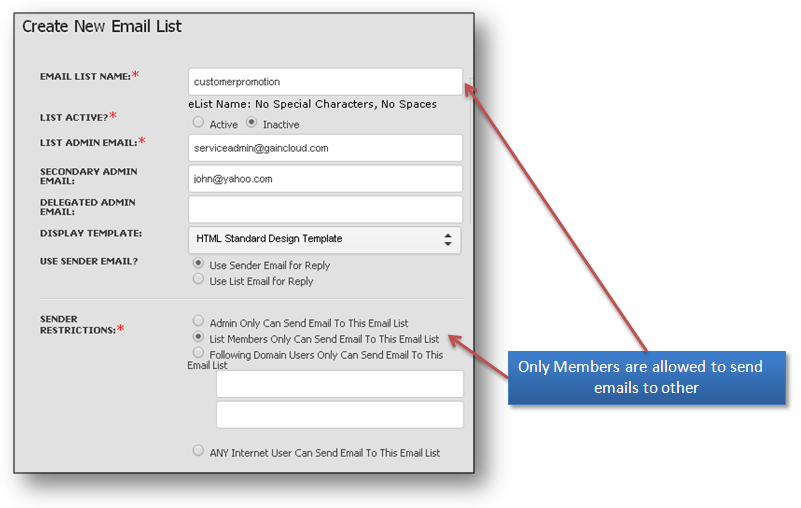
Remember to manage - add/remove members from this elist, using the "List Membership" window (once the eList is created).
Create Admin-Only Accessible - This is the most popular type of email-lists where only a selective (in our eList Service its a maximum 3 admin accounts) can send email to the eList. Any other user account will not be authorized to send emails to this eList. The administrator accounts, who are allowed to send emails to Admin-Only eList must be predefined in the Email List Section as shown below:
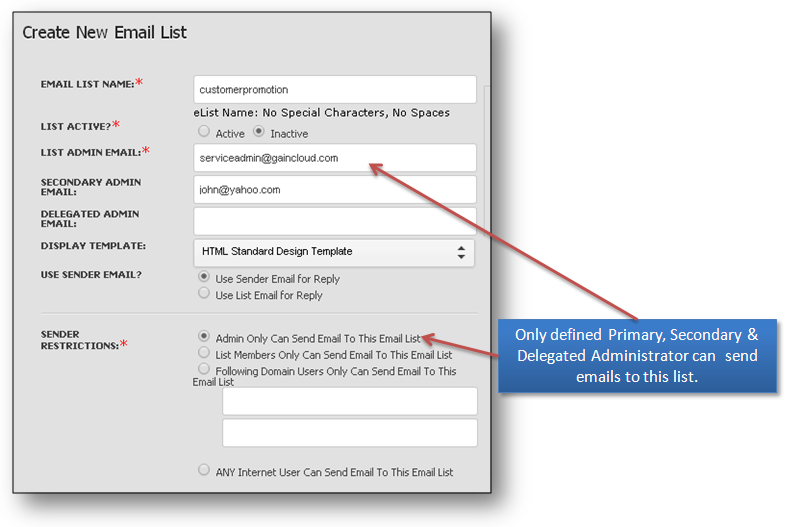
Admin Accounts those are allowed to send email to Admin-Only eList are:
1. List Admin
2. Secondary Admin or
3. Delegated Admin
Assign Members to Email eList
Step 1: On eList Service Home Page, Click on the "List Membership" Icon on top-menu as shown below.
![]()
Step 2: When "List Membership" window appears, select the eList Name, from the drop-down select-box "Email List Name" as shown below:
![]()
Step 3: eList Service will load all the active members of the respective selected eList, in a "Current Members" table. As our eList is a new eList and no members are pre-defined, we are going to add a new member to our eList.
Step 4: In order to add a new member to our eList, select a member from the user-list displayed on the right-side of the page. The user-list is populated from the local user-repository we created earlier.
Step 5: Once you select a user-entry from the user-list, click on the "Add New Member" button to add this membership for your eList (as shown below).
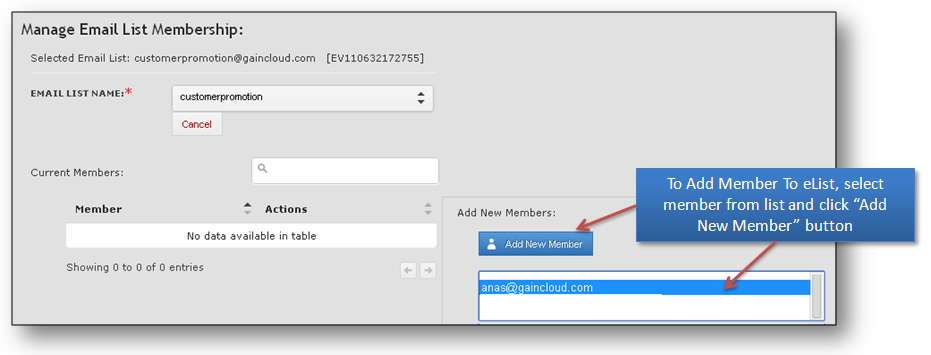
This will add a user-membership for your eList. In case you dont find a user in the user-list, you can add a user-entry first using the "User-Entry" Icon on the top-menu.
Remove Members from eList
Step 1: To remove an existing member from the eList Membership, first navigate to the "List Membership" window (click on top-menu).
Step 2: When List Membership window loads, select the eList from the Drop-Down Select-list "Email List Name". On selection, eList Service automatically lods all the list members in the Current Members table as shown below:
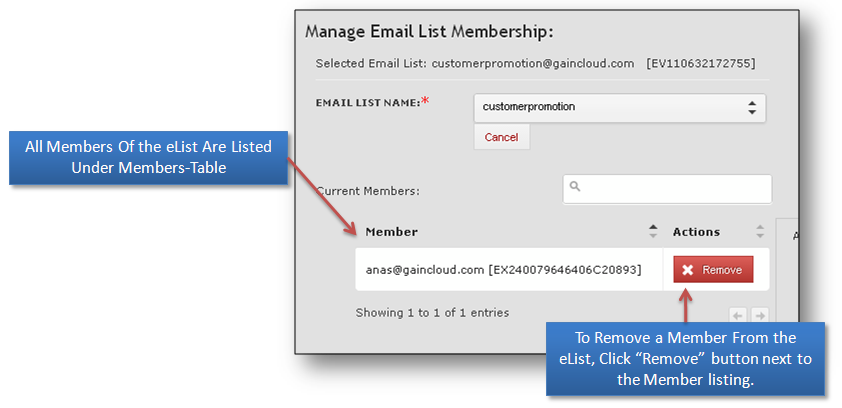
Step 3: To remove the respective member, just click on the "Remove" button next to the member email as shown above.
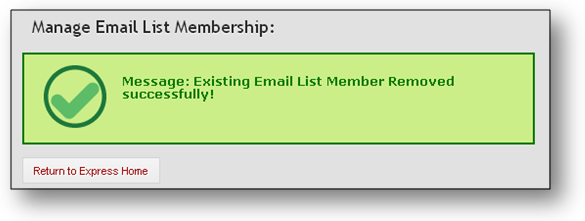
Step 4: A confirmation message, displaying "Member Removed successfully" will be displayed as shown below:
Sending Emails to eList
Sending email to an elist will automatically re-send the same email to all defined list-members. You can use your favorite email-client (like microsoft-outlook, google/yahoo email, phone-device) to send an email to your eList. Just make sure, that if your eList only accepts emails from eList admin (then you are actually the administrator) and you are sending email from your admin account as defined in the eList configuration.
As an example, we are sending an email to an eList "customerpromotion" as shown below.
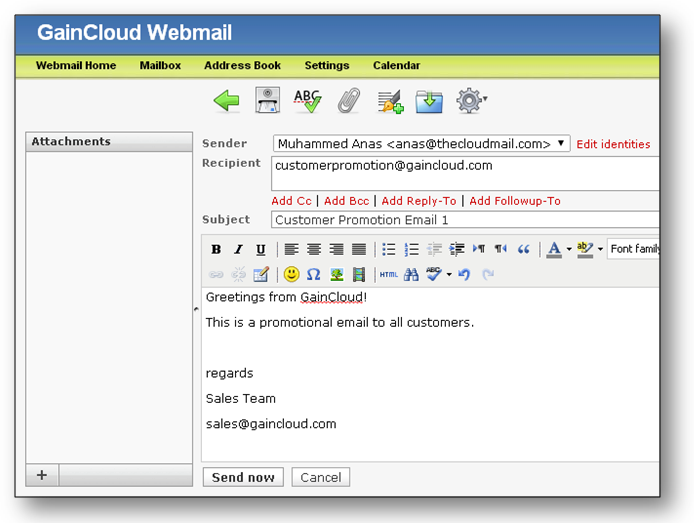
We are using our Cloud integrated WebMail software. Enter the recipient as the eList email address "customerpromotion@gaincloud.com", enter a suitable subject and email content.
Finally click on "Send Now" to dispatch the email.
Making Changes to Existing Email eList
Step 1: On eList Service Home page, Click on "Email List" Icon on top-menu. When "Email List" Window appears, select the respective eList from the list-box on right-side of the window as shown below:
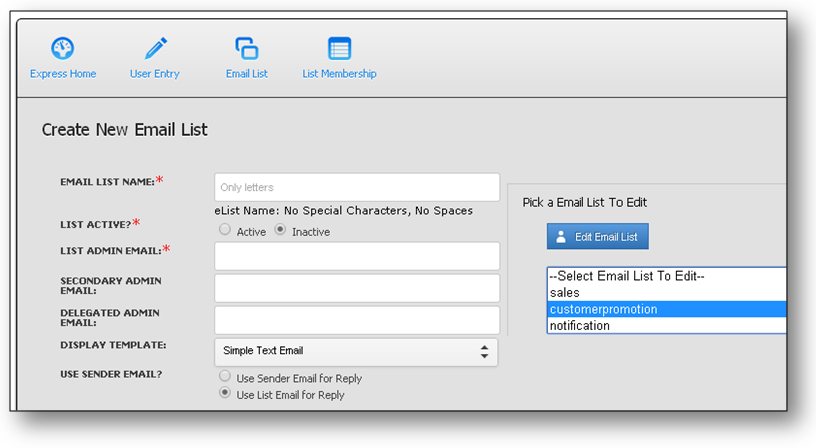
Step 2: Click on "Edit Email List" button to load the selected email-list entry for editing.
Step 3: Once email-list entries are loaded into respective edit-boxes, make required changes.
Step 4: Finally click on "Save Email List" button to save all your eList changes.
Manage Member Email Address
Step 1: On eList Services Home Page, Click on the "User Entry" Icon on top-menu.
Step 2: When "User Repository" Window appears, select the listed user-entry from the user-list on right-side of the screen as shown below:
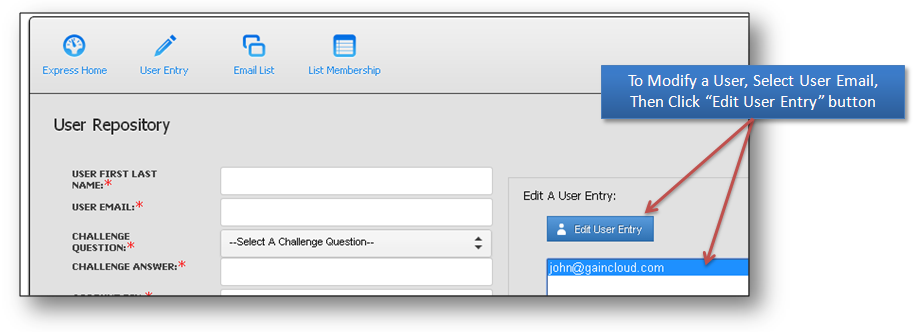
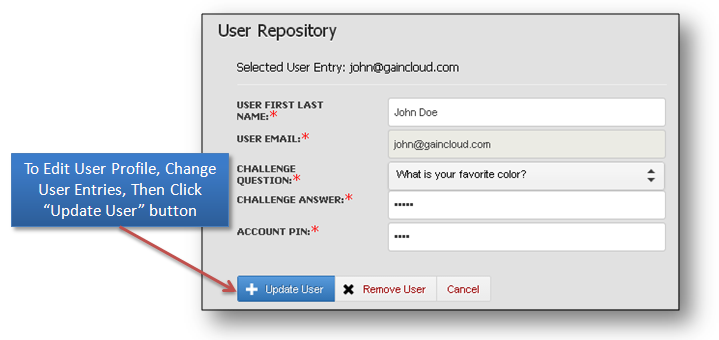
Step 3: After selecting a user from the list, Click on "Edit User Entry" button. This will load the user-entry details in the edit box. Make necessary changes to the user-profile entries and click on the "Update User" button to save the changes.