EFile Service
Contents[hide]
|
What is eFiles Service
Online File Manager Repository Service allows users and organizations to manage files and data online without the hassle of carrying physical drives everywhere. As a hosted file sharing and management service, File Manager allows users to upload, download, email, communicate and manage files (and data) online. File Manager provides you a secure, safe and dedicated online space which can be used for storing files and data over the internet, using just your web browser. Users don’t need any additional software or hardware to use this service.
eFiles Service Features
- Access your business data – Files & Folders from anywhere
- Upload, download files from any-computer/laptop, cell-phone or tablet computer
- Supports Multi-User Environment (for user-groups and organization employees)
- Create Internet-File Link and Internet-File-Copy Link and give it your friends and business contact
- Use just your browser – Internet Explorer Browser, Firefox Browser, Safari Browser & Google Chrome Browser
- You can choose an online Storage space from 2 GB (Gigabytes) to 50 TB (Terabytes)
- Store all your business data and important Files/Folders – Securely online in your private cloud.
- Stop losing important data – From Lost-Flash-drive, Hard-drive Crash, Broken DVDs, CDs & Crashed Computers!
- Create compressed ZIP files online (no WinZip, or Zip software needed)
- Allows your business contact and friends to download file (Securely) – “Without having a Member account”
- Create & Edit your files online
- Advanced File Distribution Workflow – Allows distribution of file links securely “With Tracking”
- Secure File Access – Via Password Token & SSO (Single Sign-On) Identity Management System
- Secure File Transfers – SSL Encryption Supported to prevent against common attacks
- Secure File Storage – via Data Encryption and Secure-ZIP Security
eFiles Service - Beginner Guide
Upload a File
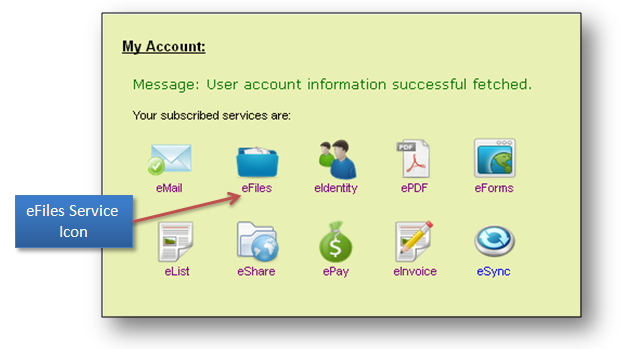
STEP 1: Click on the "eFiles Service" Icon to start the eFiles Service.
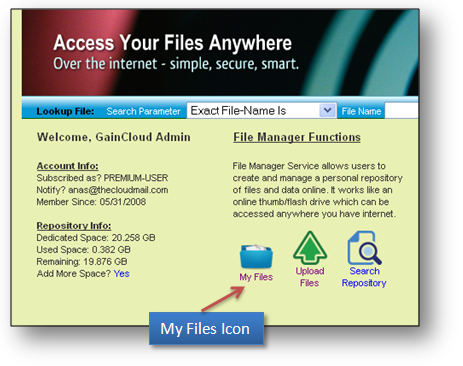
STEP 2: Once the eFiles Service loads you should see the Service home page. Click on "My Files" icon to load the Home Folder as shown below:
STEP 3: Click on "Upload A File" icon from top-menu as shown below:
![]()
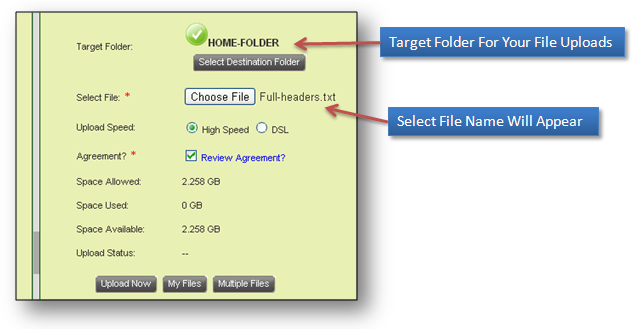
STEP 4: eFiles Service will load the File Upload page, select the file from your local computer to upload to the eFiles Cloud Repository by clicking on the "Browse" button next to the "Select File" item.
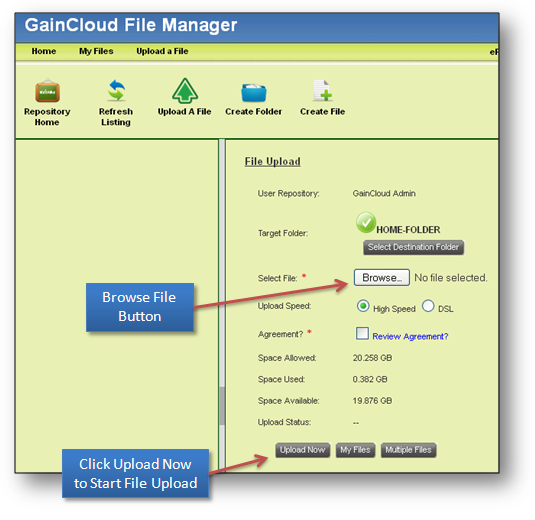
STEP 5: Make sure to check the "Agreement" checkbox - which confirms that you are responsible for the file-contents and you are the owner of the data being uploaded to your private cloud repository. Also make sure a "Target Folder" (with a green checkmark) is displayed. This is the default/selected folder where your file will get uploaded into.
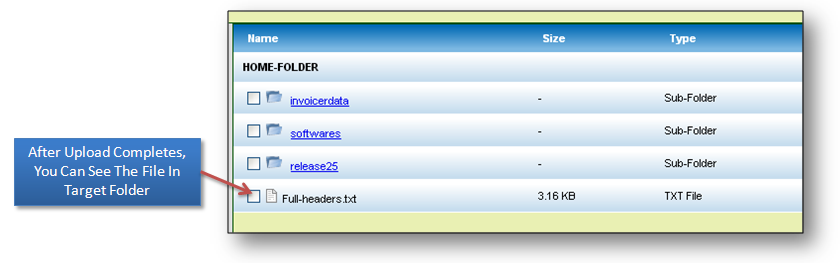
STEP 6: Finally click on the "Upload Now" button to begin the file-upload operation. Once the file is uploaded successfully, an updated view of the folder where the file was uploaded will appear automatically.
Upload Multiple files
STEP 1: eFiles Service allows uploading upto 5 files at one time.
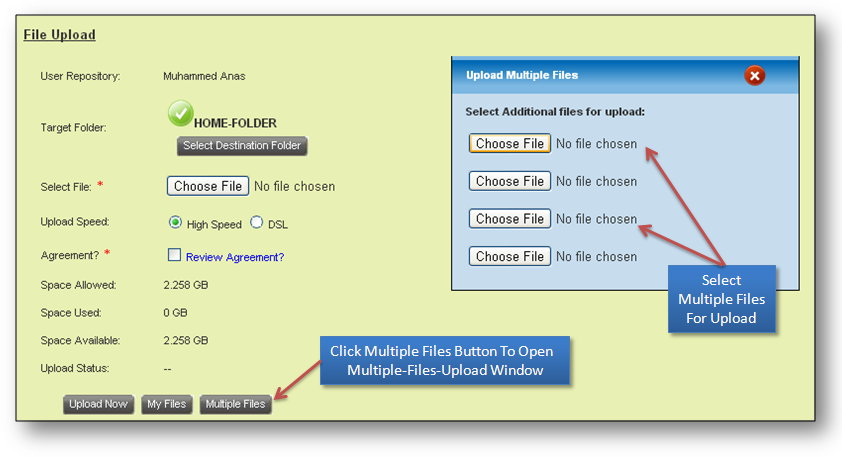
STEP 2: Click "Multiple Files" button on the "File Upload" page to view options to select multiple files for upload as shown below:
STEP 3: Once all the selectd files are uploaded successfully, an updated view of the folder where the file was uploaded will appear automatically.
Sending File - As an email attachment
Its very easy to distribute a file already uploaded/available in your eFile Repository. If the file is less than 2 MB (Megabyte) size then you can send the file as an email attachment.
STEP 1: Click on the File Name to display the File-Operations menu as shown in the popup below:
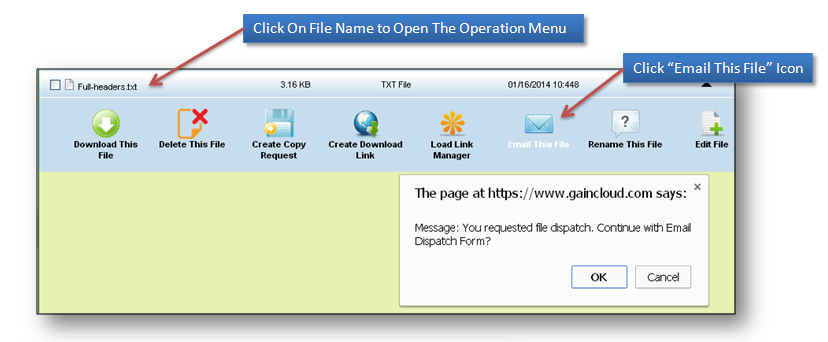
STEP 2: Click on the "Email This File" blue-icon. For the message window confirming "Continue with Email Dispatch Form?" click "Ok".
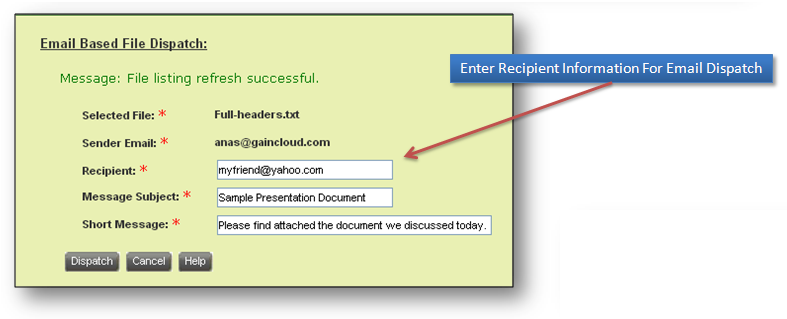
STEP 3: eFiles service will load the "Email Based File Dispatch" Window. Please enter your recipients email address - who is going to receive this file. Then provide a suitable email subject and short-message as shown below:
STEP 4: eFiles will dispatch an email to the Recipient and attach the file you requested (as an email attachment). A confirmation message will be displayed as shown below:

Sending File - As a File Download Link
A file link is the most suitable way of distributing large files without the need for attaching them to your email. Just create a unique internet-based file-link for your file and send just the link to your Recipient. The recipient can just click on the secure link to access/download the file.
STEP 1: Click on the File Name to display the File-Operations menu as shown in the popup below. Click on the "Create Download Link" blue-earth icon.
![]()
STEP 2: eFiles service will load the "Create a File Download Link" Window.
STEP 3: Click "Yes" for the question - "Email to a friend?"
STEP 4: Then enter your recipients email address - who is going to receive this file. Then provide a suitable email-subject and email-message as shown below:
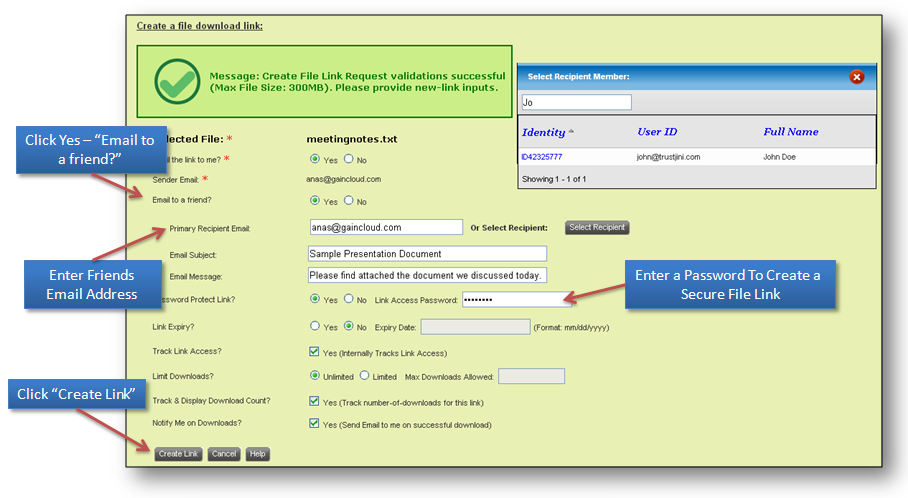
STEP 5: If you are sending this eFile-Link to one of the Cloud-Members within your organization, you can select the recipient-email address by clicking on the "Select Recipient" button. From the popup-window "Select Recipient Member" click on the member-identity-id. eFiles will automatically insert the email address into primary recipient email edit-box (as shown in the diagram above).
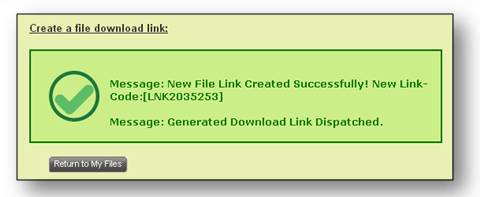
STEP 6: Click on the "Create Link" button once you are ready. A confirmation message will be displayed as shown below:
Accessing File-Link to Download a File
STEP 1: If you received a file-link (from your friend/office) regarding eFiles Service, then click on the link to open the eFiles download page as shown below:
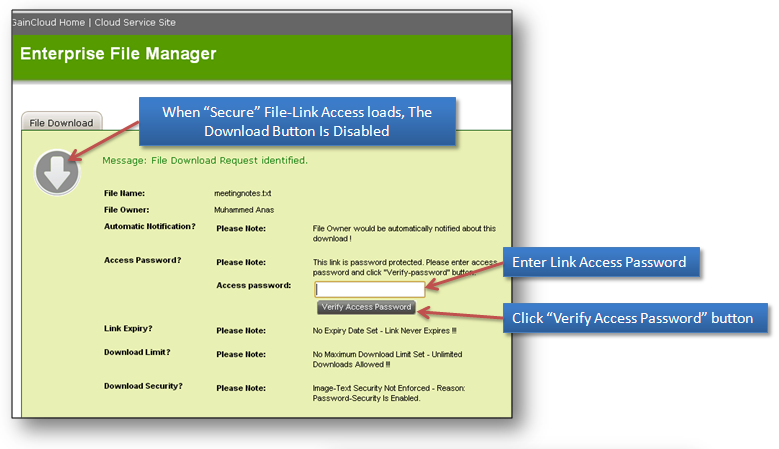
STEP 2: If your file-link was secured with a password, the password will be in the email sent to you by the file-link-owner. Check your email for the password, then type the same next to the item labeled "Access password".
STEP 3: Then click on the "Verify Access Password" button.
STEP 4: eFiles service will verify the password for the requested file-link. If password is valid then the file-download button (large down-arrow sign on page-left) will turn "Green" as shown below.
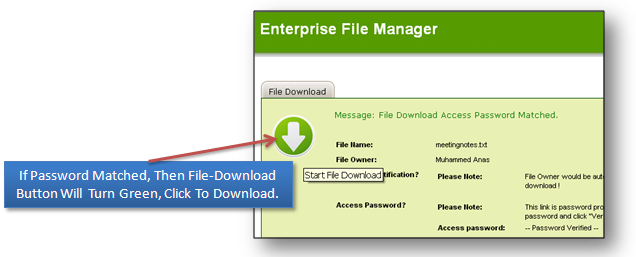
STEP 5: Click on the "File Download" button to download the file.
eFiles Essential File Operations
Create a Folder
STEP 1: To Create a folder, click on "Create Folder" Blue-Icon on top-menu (in file-repository).
STEP 2: eFiles Service loads the "Create New Folder" Window.
STEP 3: Enter the name of the New Folder in the edit-box, then click on "Create New Sub-Folder" button as shown below.
![]()
STEP 4: Once the new folder is created, it will appear under file-repository, as shown below:
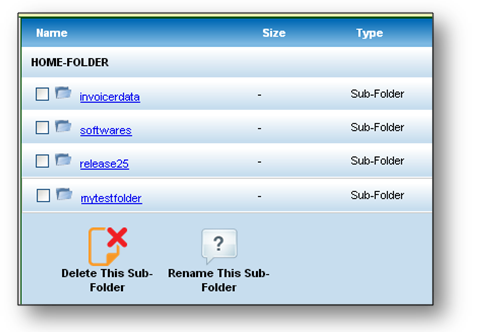
STEP 5: If you need to delete this sub-folder at any time, click the operation link next to the folder-name (row) such that Folder-Operations menu will appear (as shown below):
![]()
STEP 6: Click on the "Delete This Sub-Folder" Red-Icon. Also click on "OK" button when asked to confirm - "Continue with Deletion?".
Create a File
STEP 1: To Create a New Blank-file, click on "Create File" White-Plus Icon on top-menu (in file-repository).
STEP 2: eFiles Service loads the "Create New File" Window.
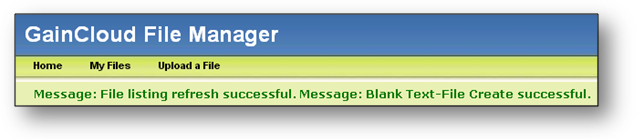
STEP 3: Enter the name of the New File in the edit-box, then click on "Create New Blank File" button as shown below.
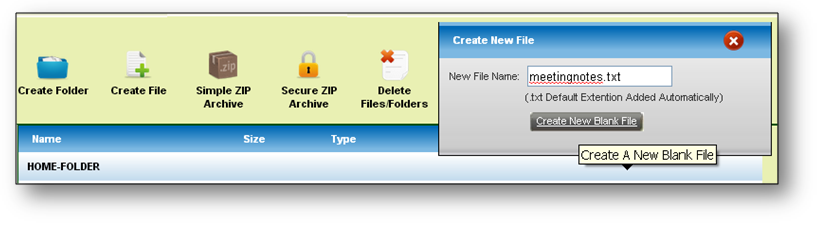
STEP 4: Once the new file is created, you should see a confirmation message as shown below:
Delete a File
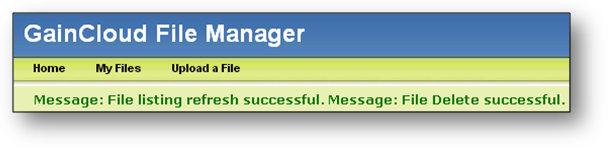
STEP 1: Click on the File Name to display the File-Operations menu. Then click on the "Delete This File" icon as shown below. For the popup alert message "Continue with Deletion?", Click OK.
![]()
STEP 2: On successful deletion of respective file, a confirmation message will be displayed as shown below:
Edit a File
STEP 1: Click on the File Name to display the File-Operations menu. Then click on the "Edit File" icon as shown below.
![]()
STEP 2: Answer "OK" for when eFiles Service will display confirmation window asking - "Continue with Editing the file <<file name>>?"
STEP 3: eFiles Service loads the "Edit a file" window and displays the content of the text file within the text box as shown below:

STEP 4: Edit the file contents as per required modifications and then click on "Save File Changes" button.
Rename a File
STEP 1: Click on the File Name to display the File-Operations menu. Then click on the "Rename This File" icon as shown below. The eFiles Service will display "Rename File/Folder Window" as shown below:
![]()
STEP 2: Enter new name for your file and click on "Rename Now" button.
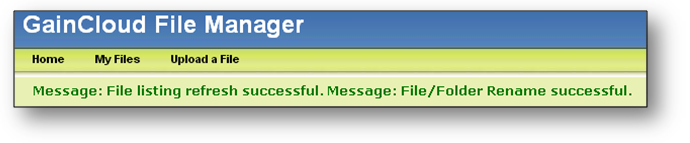
STEP 3: On successful rename of respective file, a confirmation message will be displayed as shown below:
Download a file (from your Repostiory)
STEP 1: Click on the File Name to display the File-Operations menu. Then click on the "Download This File" icon as shown below.
![]()
STEP 2: Click "OK" for the confirmation window "Start downloading now?". eFiles will download the requested file to your local computer or device/iPad.
eFiles Service - Advanced Concepts
- Email a File (As Attachment)
- Creating a Zip File
- Create Password-Protected ZIP File
- Bulk Move/Copy Folder
- Bulk Delete Folder
- Manage File Links
- Remove a file link
- Re-using a file link
- Create a file copy request
- Accept File-Copy-Request
HOW TO?
- How to make uploads faster?
- How to distribute files without copying?
- Best way to distribute large files?
- What are the limitations to email file attachment?
- How to increase repository size limit?
- How to accept file-copy request?
- How to reuse a file link which you created earlier?